Click Here to Watch the Full Veneering Demonstration

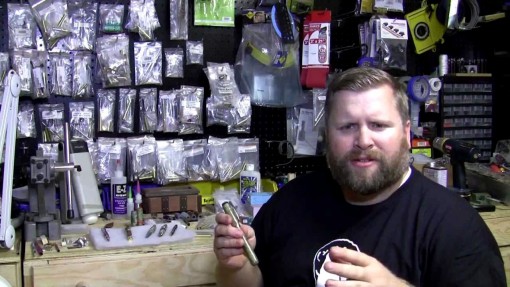
Russel Claridy of Simply Wooden Creations invited me to present a live wood veneering demonstration on his weekly YouTube show, “Let’s Talk Shop With Russ”  I was honored to have been invited and of course I said yes.  Doing a demonstration live is a bit different than doing a video because there is no editing!  I covered as much about wood veneering as possible within the time available.

Much of what I showed in this demonstration was already covered in my Basic Wood Veneering Made Easy video.  Of course the big difference, besides that there was no editing, is that this demonstration was interactive.  So, I received comments and questions as I went along.  It is also a lot more fun to present a demonstration in real time with other people as opposed to doing it in front of a camera in my shop.  Of course, I am usually not all alone when I am filming my videos because Zippy likes to stay close by.

The main points that I covered in the demonstration were:

  • Why veneer?
  • How veneer is produced and distributed
  • The importance of numbering the veneer sheets when you get them
  • My favorite place to buy veneer – Certainly Wood.com 
  • The many advantages of veneer
    • Easy to work with
    • Grain direction/wood movement is not an issue as it is with solid wood
    • Availability of exotic woods that are either  prohibitively expensive or simply not available as solid lumber
  • Pros and cons of different veneering substrates
  • Pros and cons of several different glues for wood veneering
  • Several different tools that you can use to cut veneer
  • Different ways to press veneer
  • Vacuum bags and how to inexpensively make your own vacuum bags

I also talked a little bit about marquetry and did a brief demonstration of the “window” method for producing marquetry  pieces.

Unfortunately, we ran out of time before I was able to show how I tape veneer together.

The good news is that my veneering demonstration was very well  received!  In fact, Russ asked me if I could do a follow up demonstrations sometime in the next few weeks.  Of Course I Will, and I am pretty excited about it because now that I have covered most of the basics I can move on to the really fun stuff!

In fact, I already spent a few hours in the shop deciding exactly what to demonstrate and exactly which veneers I will use.

We haven’t set a date for the follow up demonstration, but I will definitely announce it on my Facebook and Instagram accounts.



A very special thanks to  Paul Moore at Woodworkboss.com for submitting this great guest posting for the Jack Bench Blog!!

How To Start Woodworking From Your Home Garage

You want to take up woodworking in your home garage, but you don’t know where to start?

Whether you intend to do woodworking as a weekend hobby, or whether you intend to take on a series of do-it-yourself projects around the house, this guide will give you some important tips to get you started.

Choose your work-space

Before you get started, you will want to make sure that you have a clean and sufficient space to work in.

A simple, well-lit, workbench or desk should be fine for small projects. You may also want to be sure that you have sufficient power outlets, if you intend on using power tools, in your work-space.

Safety First

Once you’ve decided on your work-space, you’ll want to make sure that you have the gear to help you minimize accidents while you are working and creating.

A pair of safety glasses or goggles and some work gloves should be fine, to get you started.

Depending on the size of your projects, and what they may entail, you may also consider wearing sturdy work shoes or boots, to protect your feet and an apron to protect your clothes.


You might consider wearing some old clothes you don’t mind getting a bit mussed up, instead.

Tools of the Craft

Before starting any craft project, it’s always a good idea to make sure you have all the tools you are likely to use, on hand, before you begin.

The following is a list of tools and their purposes, to help you get started:

Marking & measuring tools:
“Measure twice. Cut once.” Before you start cutting on any piece of wood, you want to make sure you have a tape measure, a carpenter’s pencil for marking and a combination square to make sure your marks line up, properly.

Cutting tools:
There are a lot of tools to choose from, but if you are just getting started you’ll want to consider getting yourself a circular saw, for straight cuts and a jigsaw for round cuts. (*Note: you will definitely want to be sure you have safety gear when handling these power tools.)

If you don’t feel you’re quite ready for power tools or you need something less expensive and/or quiet, for cutting, a handheld back-saw is a good alternative.

Shaping tools:
To smooth out the rough spots and rough edges on your work and for details, such as beveling, carvings, and moldings, you will want to make sure you have the appropriate shaping tools.

For simple projects, some sandpaper and a small chisel kit should suffice. Sandpaper comes in a multitude of textures, so you’ll want to be sure you have the right grit for the job you’re crafting.

For bigger jobs, you’ll want to be sure to have a block plane.

For more intricate tasks, you’ll want a router that comes with a variety of bits for you to choose from.

Tools to hold it all together:
You probably already have the following items in your toolbox, but it doesn’t hurt to make sure you have a hammer, a flat-head screwdriver, and a Philips head, at the ready.

You’ll also want a cordless drill for making holes. Besides a variety of drill-bit sizes, these usually come with screwdriver bits, to save you time from using a manual tool.

Make sure that you have enough nails and screws to finish your project.

For more intricate projects, you’ll want to make sure that you have wood glue and clamps, to hold your wood pieces together, while the glue dries, if necessary.

As you can see, it’s not difficult to get started woodworking in your home garage. Once you have prepared your work-space and made a trip to your local hardware store, all that’s left is to pick your project, and purchase the wood.


I have a very nice woodworking workbench.  My bench is adjustable height, has a built in mobile base, bench dogs, a twin screw vise on one end and a quick acting face vise on the other end.  It is a fantastic bench for woodworking, which is most of what I do in my shop.  I do like metal working, but I focus on woodworking.  Occasionally, I need to use a metal vise and I discovered a great, and very easy, solution.

I have two metal vises.  I keep the better one in the garage and I have a smaller one that I keep downstairs in my woodshop.

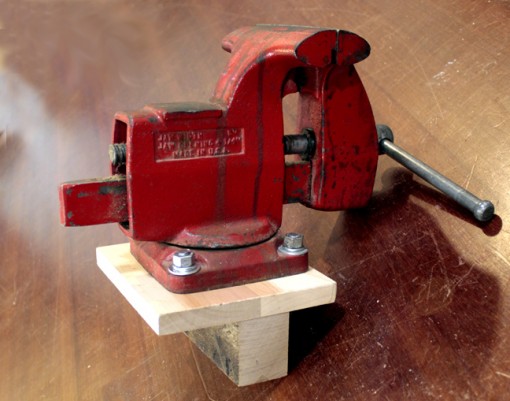
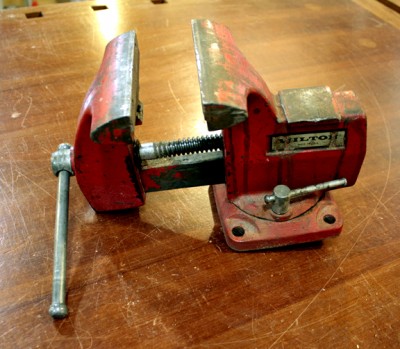
My old Wilton metal vise

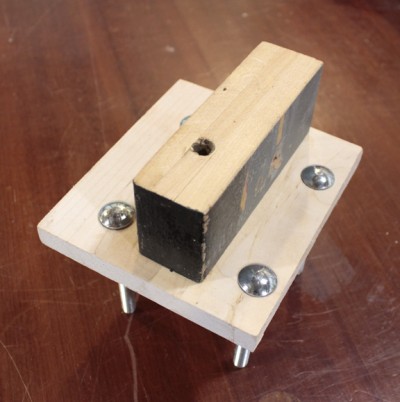
This is a really quick and easy tip.  I just bolt a tee shaped block on to the bottom of the metal vise.  On those occasions when I need a metal vise I drop it into one of the vises on my woodworking workbench, tighten it down and I am ready to go!

The block is made up of a small wooden “plate” with holes that correspond to the mounting holes in the vise. I glued another block on to the plate that can be clamped into the vise on my bench.

Tee shaped mounting block is bolted on to bottom of metal vise

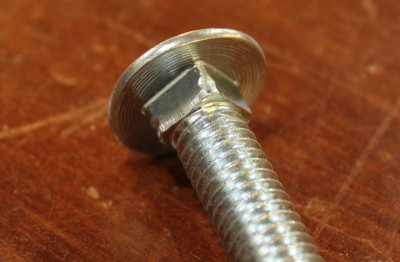
Notice that I use carriage bolts to connect the plate to the bottom of the vise.  I often use carriage bolts on wood because once I pound them into the wood they will lock in place.  This means that I don’t need two wrenches to tighten the bolt.  The heads on the carriage bolts also give a much more finished appearance than regular hex heads.

Carriage bolts have a square section just under the head

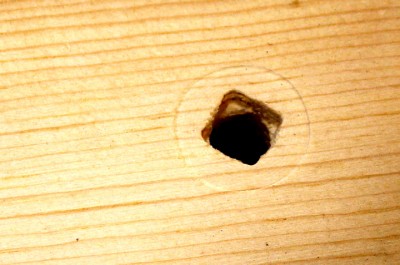
You can create a recess in wood by tapping the carriage bolt with a hammer

Then the carriage bolt will fit snugly into that recess

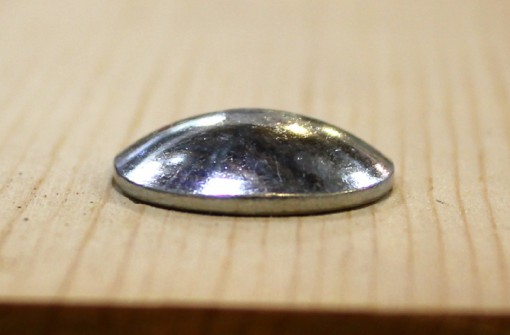
Carriage bolts have a very finished look when they are flush with the surface

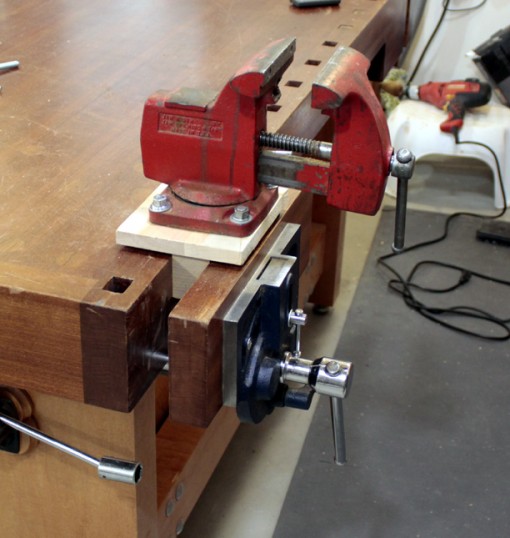
Metal Vise ready to install on Woodworking Workbench

I normally store the metal vise someplace out of the way.  When I need to use it I just pull it out, drop it into my face vise, tighten it down, and I am ready for metalworking!

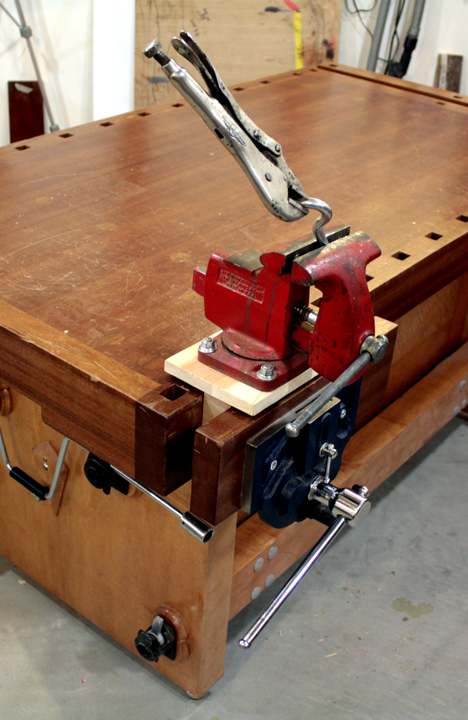
Metal vise temporarily installed on Woodworking Workbench

This is how the vise “might” look when I am actually using it!

Fun with vises on my workbench!

I have to thank my friend Al Frank for giving me the idea for this.  I don’t know if it was his original idea or if he “borrowed” it from someone else, but I really like it.  I hope you like it, too!

Please be sure to check out my other blog articles and for sure leave a comment.  I would love hear about how you approach this issue in your shop!

Thanks!

Charlie

I met with David Marks while he was still in the early stages of his greatest woodturning project (yet!).  He showed my the specialized lathe tools he uses for very large hollow vessel turnings and some of his woodturning tricks!  He also explained his amazing methods for storing, drying and stabilizing wood for his wood turning projects.


David Marks Woodturning Video Presentation

The scale of this woodturning project is amazing! The blank for this turning project weighed 400 pounds!  Even the tools he used to turn it were oversize, the boring bar all by itself weighs 125 pounds!

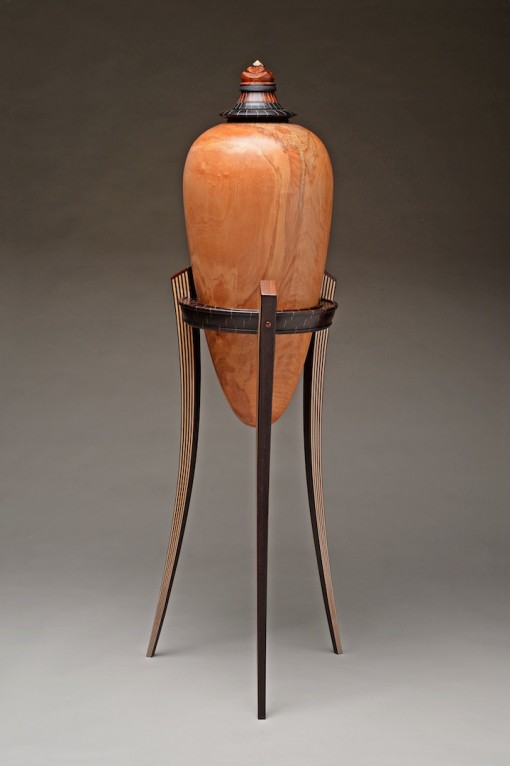
Sensei by David J. Marks

David was one of only twenty people who were invited to present at the 30th annual American Association of Woodturner’s Symposium.  This was quite an honor and he wanted to make a special piece for that.  Well, he sure did!

David Marks Sensi Hollow Vessel Wood Turning Project

His deadline for this piece was to have it completed in time for The symposium was in June of 2016 so he only had a few months to get 400 pounds of wet wood turned, dried, finished, and rubbed out and shipped from California to Boston.

David’s incredible method for drying wood includes boiling it in a pot of water and soaking it in alcohol.  This surprising method is very effective in preventing warping, checking, and cracking.  Not only does this produce a great result, but it does it very quickly!

The magnitude of this project is much bigger than it appears and it took David over 1000 hours to complete it. That by itself amazes me.  My thinking goes something like this: If it takes a guy like David Marks a thousand hours then I can’t even imagine how long it would have taken someone like me!

The end result was a true masterpiece. David named the piece Sensei.  Sensei means “Teacher” in Japanese and he chose that name because he learned so much from this project.

Top of Sensei has hand chased threads

David says he decided to title this piece “Sensei” because it means teacher in the Japanese Culture and this vessel taught him one hell of a lot!!

The completed vessel on the stand with the lid is 57 inches tall. The footprint is 22 inches in diameter.

Materials starting from the top down:

  • Betel nut
  • African Blackwood
  • Quilted Mahogany from “The Tree”
  • African Blackwood, textured on the outside and hand chased threads on the inside
  • Snakewood, one of the rarest woods in the world.  The snakewood is segmented with veneers of Holly.
  • Ebony, segmented with veneers of Holly
  • Spalted, figured, Big leaf Maple for the hollow vessel (32inches deep)
  • Snakewood for the caps on top of the legs
  • Wenge and Maple bandsawn and planed and drum sanded down to 1/32 inch thick at the feet. There are 11 layers of wenge and maple all tapered.
  • Wenge segmented with Holly veneers

If you are looking for a showpiece for your living room or your corporate headquarters then you are in luck because, remarkably, this piece is still available.

Inquiries can be made by emailing him at: david@djmarks.com

David wrote an extensive and very interesting article about this piece and I strongly encourage you to check it out!

I met Braxton Wirthlin in January of this year at his wood shop in Boulder City, Nevada.  Well, actually we met at a local pub first, but I digress.  Braxton is a very creative guy and he loves making things.  His interests range from traditional woodworking, to digital woodworking (with CNC’s), to wood turning, to welding, to ceramics, to cooking, and videography.  I am sure there are others; these are just the ones that I am aware of!

Braxton studied Visual Media Production at the Las Vegas Art Institute.  His creativity and his skill with video production really show through in his videos.  A great example of this is the video where he demonstrated turning a pen and the entire demonstration is filmed in reverse.  It is nice to see YouTube videos that include a bit of artistry.  Not everyone can pull this off, but Braxton does!  See for yourself here: Braxton’s Pen Turning Video

One of his more clever ideas was to to buy an ice cream scoop, a nut cracker, and a bottle opener at the dollar store.  He then stripped off the cheap plastic handles and added custom made wooden handles.  What impressed me about this was that he was able to think out of the box and save a ton of money as opposed to buying similar items from a dedicated woodworking supply store.

He got his start with video production by filming his friends riding their BMX bicycles when he was a kid. Braxon also built the wooden ramps and half pipes that they would ride over and this gave him some of his first exposure to woodworking.  He says that he was one of those kids who was fascinated with all things mechanical, and he was always taking things apart to see how they worked.  Sometimes he couldn’t put them back together again, but that is how we learn!

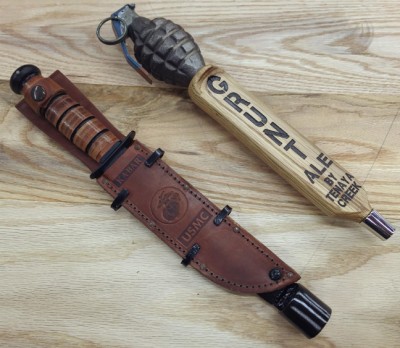
In addition to making YouTube videos, Braxton also keeps himself busy with commission work.  One of my favorite pieces that he made was a tap handle for a local brewery.  This might look like a simple project, but it required use of his skills with design, traditional woodworking tools, woodturning, digital woodworking and wood finishing.  Not to mention his ability to get the commission to begin with by marketing those skills.

Tap Handles by Braxton Wirthlin

When I met Braxton he was taking wood turning lessons from Jimmy Clewes, so it is no wonder that he is such a good wood turner!  He had also just purchased a new welder and was planning to incorporate more metal into his work.

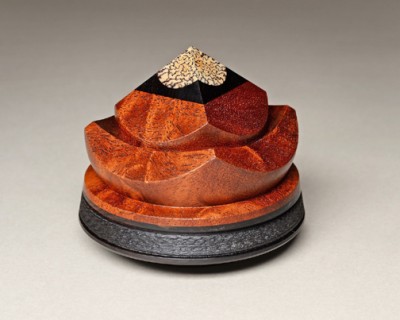
Lidded Bowl by Braxton Wirthlin

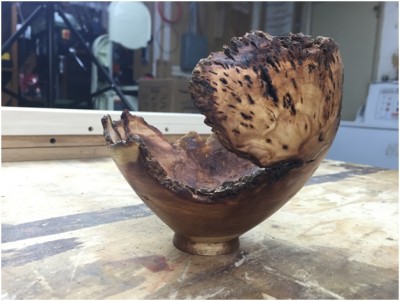
Natural Edge Bowl by Braxton Wirthlin

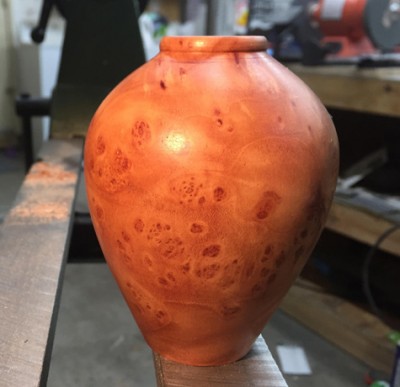
Vase by Braxton Wirthlin

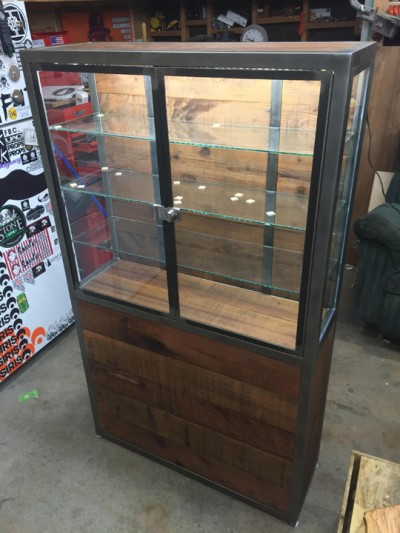
Wood and Metal Cabinet for a client

With all of his accomplishments, Braxton manages to live a well-balanced life.  He is a true family man and a stay at home dad who keeps his priorities straight.  I very much enjoyed meeting him and I look forward to the day when our paths cross again.

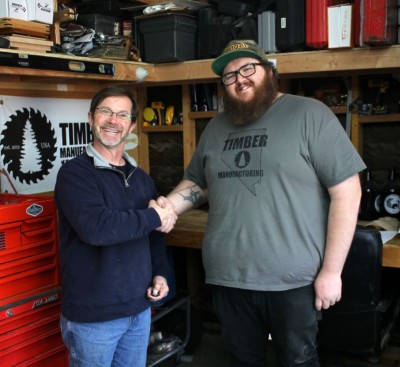
Charlie Kocourek and Braxton Wirthlin

Here are a few of my other articles and interviews that you might like:

Peter Brown Interview – The Epoxy King

Michael Cooper – Dream Shop Tour!

This was an amazing trip, I met and interviewed some of the most talented woodworkers in the country!  The interviews and the videos will be fantastic, but I the best part for me personally is that I made so many new friends.

I was on the road for 7-1/2 weeks, I drove through 11 states and I put 6800 miles on my car. Another unfortunate statistic is that I gained 7 pounds while I was gone, a pound a week! It is a good thing I got home when I did because I would really be in trouble if I stayed out much longer!

I interviewed a total of 11 different woodworkers: The Wood Whisperer – Marc Spagnuolo, David Marks, Peter Brown, Matthew Morris, Andrew Klein, Ray Mowder of Tab Left Workshop, Braxton Wirthlin, Zac Higgins of NV Woodworks, Michael Cooper, Chad Schimmel and Chris Kerschner of Adventures in DIY.

During the trip I met a total of 14 different woodworkers and filmed at least 22 separate videos.  Over the next several months I will post all of them to myYouTube channel and put them on my blog.

During the last leg of my trip I met woodworkers in Phoenix and Denver. The Wood Whisperer, Chad Schimmel, and Ty Moser live in the Phoenix area. I then met with Andy Klein in Denver.

I will post more details about all of the interviews as I complete the editing and get them up on YouTube! Unfortunately, my computer is having trouble handling the huge video files and editing is taking a lot longer than I thought it would. The computer problems is just a bump in the road. I am sure I will work through it and start posting those interviews very soon!

Charlie with The Wood Whisperer, Marc Spagnuolo at his shop outside of Phoenix, Arizona

Chad Schimmel in the pen making section of his woodshop in Chandler, Arizona.

Charlie with Andy Klein in his Denver woodshop.

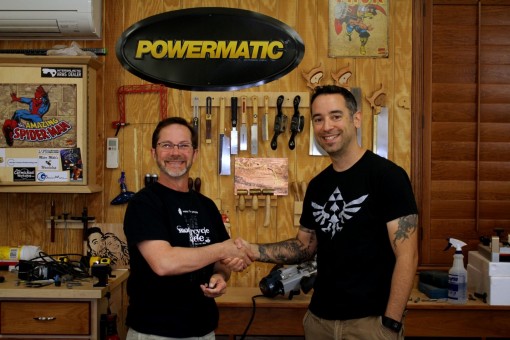
Charlie with Ty Moser in Phoenix

I also got to meet Ty Moser while I was in Phoenix. I didn’t even know that he lived there, but through the magic of social media we connected. Ty is a great guy!. He and I met for lunch and I liked him very much. In fact, I would like to do some kind of collaboration with him, but I have NO IDEA what that might look like!

It was a wonderful trip, but I am very happy to be back in my shop. The travel and the interviews were an experience that I will never forget, but am a woodworker and I want to get started on my next project!

Until next time –

Charlie from Jack Bench Woodworking!