Free Plans for an Innovative New Workstation Design
I designed a workstation for the Shaper Origin that converts from a Vertical Workstation to a Horizontal Workstation. You can get free plans for it here on my website. I incorporated quite a few features into my design and I will describe those to you in this article. I have an accompanying article and two videos where I describe the actual plans in more detail. That article also has some tips on how you can build one for yourself. I strongly encourage you to read the second article on my blog if you plan to build one for yourself. These free plans will also be available through the Shaper Hub. But, I’m getting ahead of myself!
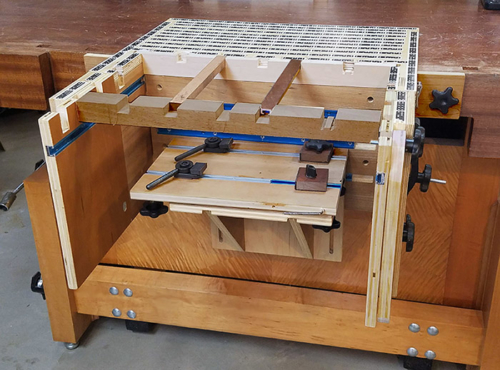
Workstation Set Up for Horizontal Work
I should mention that the workstation that is shown in the photos was the first one of this design. There are a few spots where I improved the design after I started using it, and some of them show in the photos. Rest assured, that I updated the free plans to make it easy for you when you build one for yourself.
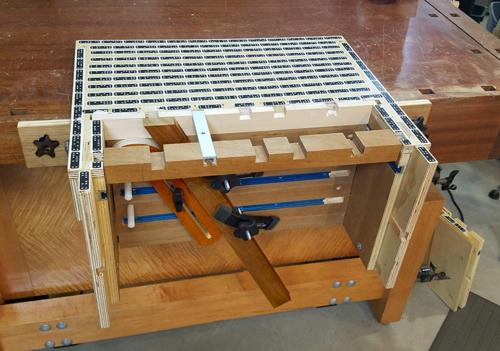
Workstation Set Up for Vertical Work
So, What’s a Shaper Origin?
The Shaper Origin, it’s like a regular router on steroids! Basically, you tell it what you want to cut, guide the machine close to the cut line, and the Shaper Origin adjusts the bit to cut precisely where you want it to. The Origin uses a built in camera and special tape with a domino pattern as a reference to orient itself to the work piece. This tape must be perfectly level with the cutting surface, and that’s where the workstation comes in.
Why THIS Workstation Design?
I used lots of shims to align my cutting surface with the tape field when I first started using the Origin. Using shims was inconvenient, at best. It was obvious that I needed a way to easily adjust the height of my work in reference to the tape field.
There are plans for several different workstation designs on the Shaper Hub. It seemed to me that most of them are best for vertical work like cutting joinery on the ends of boards. A few of them will accommodate horizontal work, but I wanted to incorporate some of my own ideas.
The minimum requirements for my workstation design were:
- Precisely hold vertical work at any angle
- Precisely hold fairly large pieces for horizontal work
- Comfortable to use regardless of item’s shape or size
- Securely attach to my workbench
- Support around all four sides of the work so that the Shaper Origin (router) won’t tilt if I’m working near the edge of the piece.
I also wanted the ability to use both double stick tape and/or cam clamps to hold the work.
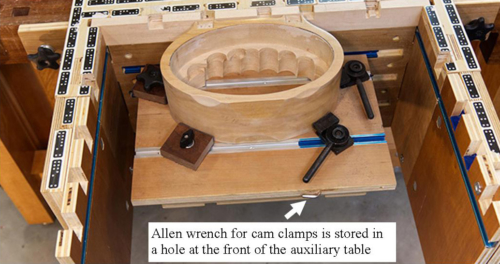
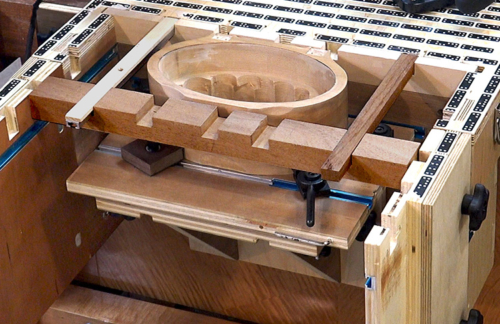
Oval box held in place with cam clamps
Fortunately, I was able to work all of these features into the design and I am able to offer the plans for free.
Workstation Features:
In order to comfortably hold both vertical and horizontal work the design allows you to convert the workstation to suit the job. I did this by adding an “extension wing” on each side of the workstation. When they’re removed I can work right up close to the tape board without the wings getting in my way. But, the workstation will hold a piece of wood up to 20″ wide, 12″ deep, and 7-1/2″ tall when they’re in place. One of the nice things about the wings is that there are registration blocks on the workstation so that installing them is super easy.
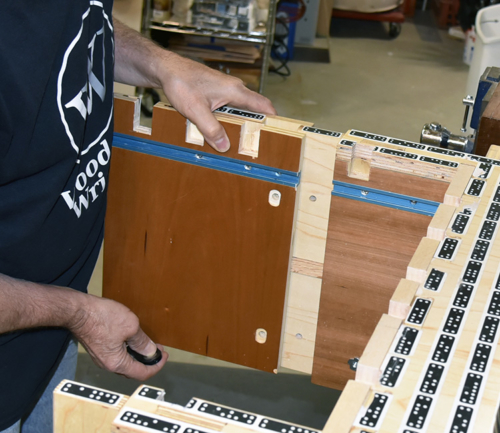
Installing Extension Wing onto Workstation
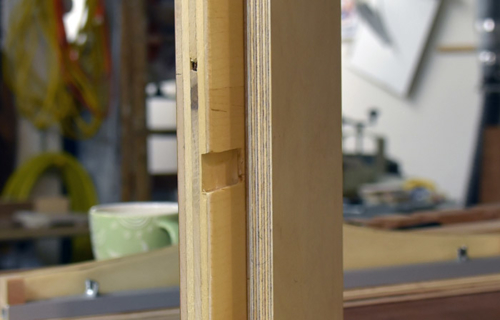
Wings have slots that slide onto small blocks on sides of Workstation
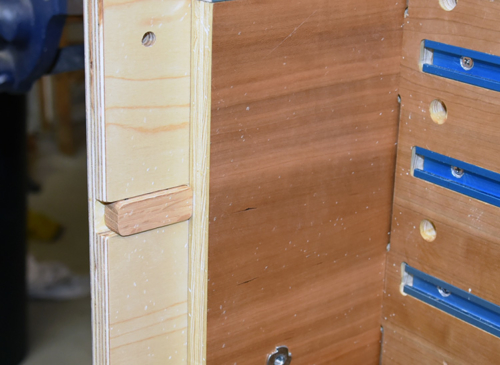
Close up of registration blocks on sides of Workstation
Figuring out how to support the Shaper around the edges of the work piece was a bit of a challenge. What I ultimately came up with is a movable rear support piece. I added a similar moving support piece (or pieces) to support the Shaper Origin on the sides of the work piece.
Movable Supports can be positioned around all sides of any work piece.
Holding Your Work Pieces in Place
Horizontal Pieces (with cam clamps)
Double stick tape holds the work in place quite nicely, but I would rather not use it if I don’t have to. I like the idea of saving money on tape and eliminating the time required to apply and then remove it.
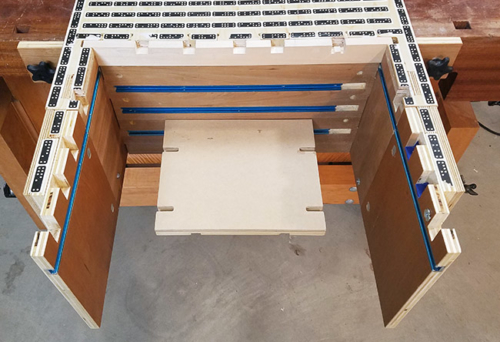
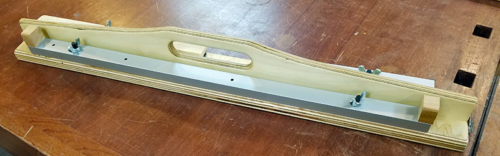
Tee tracks seemed like a good starting point for this, but I needed them out of the way for when I make through cuts. My solution is a work surface with tee tracks and cam clamps that can be removed when it isn’t needed. I like how the retaining bolts are captive on the bottom of that work surface. That makes it really easy to install and remove it.
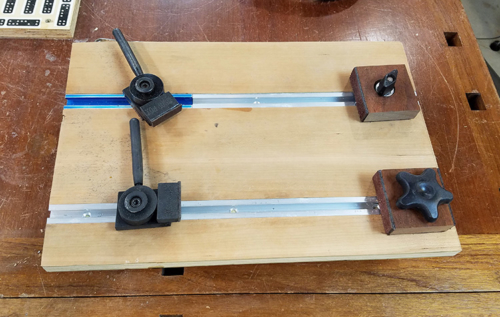
Auxiliary table for clamping horizontal work pieces

Short pieces of tee track on the bottom of the table hold the bolts in place
Auxiliary table clamped in place on Shaper Origin Workstation
Horizontal Pieces (with tape)
There are times when I can’t use the auxiliary table with the cam clamps. Usually, this is when I need to make through cuts, and I sure don’t want to cut through the tee tracks. If I must use double faced tape, then I remove the auxiliary table and tape my work right onto the horizontal support.
Horizontal support board. I double stick taped a piece of 1/4″ MDF on it for a spoil board.
Holding Vertical Work Pieces
Holding a piece vertically in the workstation has different requirements than holding a large flat work piece. Cutting joinery is one example when the piece is usually in the vertical position.
In this case, I can remove the extension wings and the horizontal support piece and install the three 1/2″ alignment pins. These can be installed on either the left or right side of the workstation. Either way, they form a vertical plane that is exactly perpendicular to the tape field. You know that your work piece is exactly 90 degrees to the tape board whenever you butt it against them.
If you want something other than 90 degrees then slip the Angle Support piece over the top alignment pin. Once it’s there you can use a tee bolt to lock it at any angle you need.
Regardless of the angle, you can secure the work any way you want by adjusting the clamps that ride in the tee tracks.
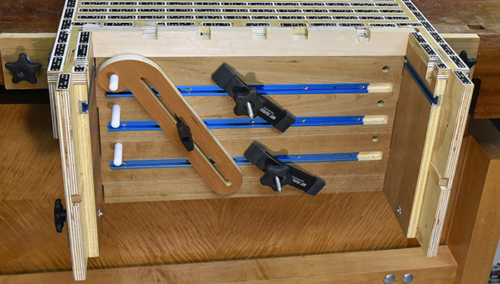
Securely lock vertical pieces at whatever angle is needed.
Vertical Positioning
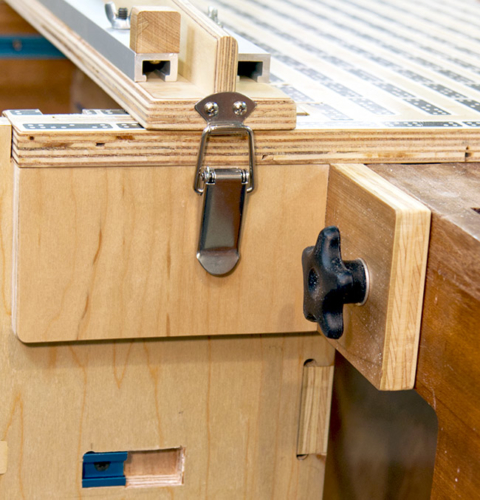
In addition to this, I added what I call a Vertical Stop Piece that latches across the top of the workstation. I push my work up against the bottom of the stop before I tighten the clamps that secure it in place. This allows me to very easily set the top (work surface) exactly flush with the tape board.
I got this idea from the workstation that is offered by Origin. Speaking of that workstation, I like it a lot, but I think this design is better for large horizontal work pieces.
A bonus is that the Vertical Stop Piece makes a nice a carrying handle!
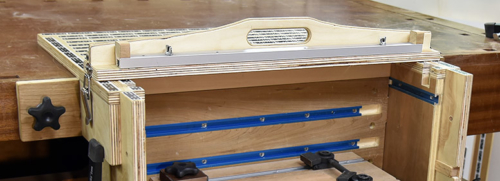
Vertical stop makes it easy to adjust the work level with the tape field
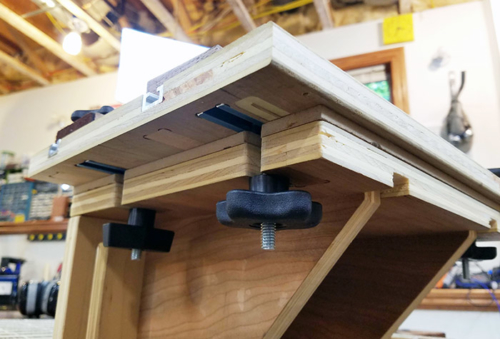
Fastening Workstation to the Workbench
I loved the idea of bolting the workstation to the sides of my workbench. I added a large tab on each side of the workstation and installed 3/8″ Studded Star Knobs in them so that they can’t fall out. (Details on how I did that in the next article) I then tapped threads directly into the side of my bench top. My idea was to just hold up to the bench and bolt it in place.
That worked, but the bolts by themselves didn’t hold it securely enough. I then drilled holes at the corners of the tape board and drove a few screws into the bench top. (I got this idea from Roland Johnson when I visited his shop). That worked well, especially for vertical work. But, it needed more support when I clamped a large horizontal piece in place.
Finally, I added a few support braces that butt against the side of my workbench. I don’t need them for light work, but the workstation is rock solid when they’re in place!
On Board Storage
Finally, I wanted on board storage for the various accessories.
- I store some of the Shaper support pieces on the Vertical Stop Piece with wing nuts.
- I store the Angle Support Piece on one of the extension wings.
- The round stops that set vertical work to exactly 90 degrees can be stored right in the workstation or they can be stored in a small bag.
- The rear Shaper support board can be stored right in the workstation.
- I store the clamps on the outside of the workstation.

I store some of the support pieces on the Vertical Stop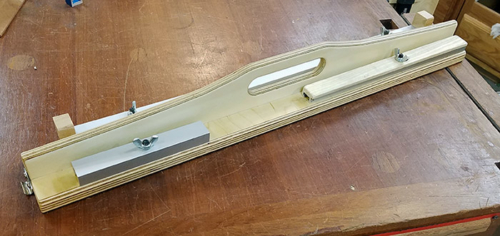
More about the free plans
The free plans for this workstation are pretty good if I do say so myself! But, there are a few things you need to know before you start building. They include the Sketchup file, and all of the SVG files. Pieces in the SVG files have blue text on them to help with mortise depth, part size, etc.
My Adjustable Height Workbench Plans include very comprehensive written instructions. For the workstation I include a pdf that lists all of the individual pieces, and some information that would be helpful during the build. This isn’t as comprehensive as the instructions for my workbench, but I believe that the with the available files, my two videos, and these two blog articles you will have no trouble building one for yourself. Plus, there is a lot of generic information on the Shaper Hub about workstations that would be helpful. I should also let you know that even though I am giving the plans away for free, I promise that I will offer the same level of support and help that I do with my bench plans. Just send me a message through my contact page if you have any questions.
There is a bit more information in the second article. I strongly encourage you to look at that and check out the videos before building your own.
Videos
I made two YouTube videos about my workstation. The first video is complementary to this article and it describes the features of the design. The second video is complementary to the other blog article about the workstation and focuses more on how to build one for yourself.
Happy and Appreciative
I’m very happy with my new workstation. I think it will allow me to have more fun and be much more efficient with my Shaper Origin.
Finally, I want to thank all the people who previously uploaded workstation designs to the Shaper Hub. My design is an iteration of what I saw there and it would not be nearly as good if I hadn’t seen theirs first. Again, these plans are free for you to use.

